MySQL 监控环境如何建立
本文给大家推荐一款颜值实力派的监控展示软件 Grafana,围绕 MySQL,快速打造 Prometheus+Grafana 监控系统。
提起监控软件,可能是这样的:
也有可能是这样的:
那么今天给大家推荐一款颜值实力派的监控展示软件 Grafana 。
本文围绕 MySQL,快速打造 Prometheus+Grafana 监控系统。
所需工具:
Prometheus
Grafana
mysqld_exporter
01 工具介绍
1)Prometheus,是一套开源的监控&报警&时间序列数据库的组合,起始是由SoundCloud 公司开发的。成立于2012年,之后许多公司和组织接受和采用prometheus,他们便将它独立成开源项目,并且有公司来运作.该项目有非常活跃的社区和开发人员,目前是独立的开源项目,任何公司都可以使用它。
官方 GitHub 地址为:https://github.com/prometheus/prometheus
官方地址:https://prometheus.io/
主要功能:
多维 数据模型(时序由 metric 名字和 k/v 的 labels 构成)。
灵活的查询语句(PromQL)。
无依赖存储,支持 local 和 remote 不同模型。
采用 http 协议,使用 pull 模式,拉取数据,简单易懂。
监控目标,可以采用服务发现或静态配置的方式。
支持多种统计数据模型,图形化友好。
-架构拓扑图-
功能简述:
prometheus server: 定期从静态配置的 targets 或者服务发现targets 抽取的数据。
exporters:负责向prometheus server传输抽取数据。比如监控主机有node-exporters,mysql有MySQL server exporter。
pushgateway:主要使用场景为:Prometheus 采用 pull 模式,可能由于不在一个子网或者防火墙原因,导致 Prometheus 无法直接拉取各个 target 数据。在监控业务数据的时候,需要将不同数据汇总, 由 Prometheus 统一收集。
Alertmanager:实现prometheus的告警功能。
webui:主要通过grafana来实现webui展示。
2)Grafana
grafana 是一款采用 go 语言编写的开源应用,主要用于大规模指标数据的可视化展现,基于商业友好的 Apache License 2.0 开源协议。
在网络架构和应用分析中最流行的时序数据展示工具,并且也在工业控制、自动化监控和过程管理等领域有着广泛的应用。
grafana 有热插拔控制面板和可扩展的数据源,已经支持绝大部分常用的时序数据库
包含以下:Graphite、Elasticsearch、CloudWatch、InfluxDB、OpenTSDB、Prometheus
3)mysqld_exporter
mysqld_exporter主要用于抽取MySQL数据,回传到Prometheus service
02 快速部署
1)安装 grafana
登录 grafana 官网下载界面(https://grafana.com/get)选择下载。
下载到本地进行 yum 安装
[root@albert monitor]# yum localinstall grafana-5.2.1-1.x86_64.rpm
Loaded plugins: refresh-packagekit, security
Setting up Local Package Process
Examining grafana-5.2.1-1.x86_64.rpm: grafana-5.2.1-1.x86_64
Marking grafana-5.2.1-1.x86_64.rpm to be installed
file:///media/disk/repodata/repomd.xml: [Errno 14] Could not open/read file:///media/disk/repodata/repomd.xml
Trying other mirror.
Resolving Dependencies
--> Running transaction check
---> Package grafana.x86_64 0:5.2.1-1 will be installed
--> Finished Dependency Resolution
Dependencies Resolved
=================================================================================================================================================================================================
Package Arch Version Repository Size
=================================================================================================================================================================================================
Installing:
grafana x86_64 5.2.1-1 /grafana-5.2.1-1.x86_64 158 M
Transaction Summary
=================================================================================================================================================================================================
Install 1 Package(s)
Total size: 158 M
Installed size: 158 M
Is this ok [y/N]: y
Downloading Packages:
Running rpm_check_debug
Running Transaction Test
Transaction Test Succeeded
Running Transaction
Installing : grafana-5.2.1-1.x86_64 1/1
### NOT starting grafana-server by default on bootup, please execute
sudo /sbin/chkconfig --add grafana-server
### In order to start grafana-server, execute
sudo service grafana-server start
Verifying : grafana-5.2.1-1.x86_64
Installed:
grafana.x86_64 0:5.2.1-1
Complete!
[root@albert monitor]#
将 grafana-server 加入开机启动
[root@albert monitor]# service grafana-server start
Starting Grafana Server: ... [ OK ]
[root@albert monitor]# chkconfig --add grafana-server
[root@albert monitor]# service grafana-server status
grafana-server (pid 128243) is running...
端口:
[root@albert monitor]# netstat -plntu | grep grafana-serv
tcp 0 0 :::3000 :::* LISTEN 128243/grafana-serv
登录控制台,本地 IP+3000 端口(默认)
用户:admin
密码:admin(默认)
主菜单:
2)部署 Prometheus
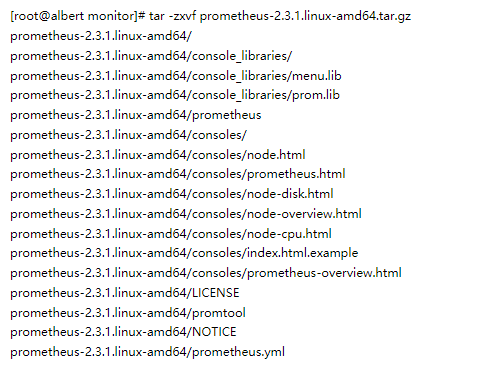
解压安装包:
配置 Prometheus:
[root@albert prometheus-2.3.1.linux-amd64]# cat prometheus.yml
# my global config
global:
scrape_interval: 15s # Set the scrape interval to every 15 seconds. Default is every 1 minute.
evaluation_interval: 15s # Evaluate rules every 15 seconds. The default is every 1 minute.
# scrape_timeout is set to the global default (10s).
# Alertmanager configuration
alerting:
alertmanagers:
- static_configs:
- targets:
# - alertmanager:9093
# Load rules once and periodically evaluate them according to the global 'evaluation_interval'.
rule_files:
# - "first_rules.yml"
# - "second_rules.yml"
# A scrape configuration containing exactly one endpoint to scrape:
# Here it's Prometheus itself.
scrape_configs:
# The job name is added as a label `job=<job_name>` to any timeseries scraped from this config.
- job_name: 'prometheus'
# metrics_path defaults to '/metrics'
# scheme defaults to 'http'.
static_configs:
- targets: ['172.16.94.181:9090']
运行 Prometheus:
[root@albert prometheus-2.3.1.linux-amd64]# ./prometheus --config.file=prometheus.yml
level=info ts=2018-07-11T09:16:00.496842912Z caller=main.go:222 msg="Starting Prometheus" version="(version=2.3.1, branch=HEAD, revision=188ca45bd85ce843071e768d855722a9d9dabe03)"
level=info ts=2018-07-11T09:16:00.496913131Z caller=main.go:223 build_context="(go=go1.10.3, user=root@82ef94f1b8f7, date=20180619-15:56:22)"
level=info ts=2018-07-11T09:16:00.496933529Z caller=main.go:224 host_details="(Linux 2.6.32-431.el6.x86_64 #1 SMP Wed Nov 20 23:56:07 PST 2013 x86_64 albert (none))"
level=info ts=2018-07-11T09:16:00.496949832Z caller=main.go:225 fd_limits="(soft=1024, hard=4096)"
level=info ts=2018-07-11T09:16:00.505128258Z caller=main.go:514 msg="Starting TSDB ..."
level=info ts=2018-07-11T09:16:00.509703595Z caller=web.go:415 component=web msg="Start listening for connections" address=0.0.0.0:9090
level=info ts=2018-07-11T09:16:00.5495258Z caller=main.go:524 msg="TSDB started"
level=info ts=2018-07-11T09:16:00.549583533Z caller=main.go:603 msg="Loading configuration file" filename=prometheus.yml
level=info ts=2018-07-11T09:16:00.570661335Z caller=main.go:500 msg="Server is ready to receive web requests."
登录Prometheus控制台,由于还没有部署MySQL_EXPORTER,所以只有Prometheus。
3)安装 mysqld_exporter
mysqld_exporter,负责抽取 MySQL 基础性能数据。
下载:mysqld_exporter(prometheus.io/download/#mysqld_exporter)。当然也要下载对应系统的版本。
解压后的内容如下:
[root@albert mysqld_exporter-0.11.0.linux-amd64]# ls -l
total 14064
-rw-r--r--. 1 3434 3434 11325 Jun 29 11:08 LICENSE
-rwxr-xr-x. 1 3434 3434 14381431 Jun 29 11:00 mysqld_exporter
-rw-r--r--. 1 3434 3434 65 Jun 29 11:08 NOTICE
进行mysqld_exporter 配置:
这里配置需要连接监控的MySQL数据库信息
[root@albert mysqld_exporter-0.11.0.linux-amd64]# cat .my.cnf
[client]
host = 172.16.94.181
user=root
password=xxxxx
启动 mysqld_exporter:
[root@albert mysqld_exporter-0.11.0.linux-amd64]# ./mysqld_exporter --config.my-cnf="/monitor/mysqld_exporter-0.11.0.linux-amd64/.my.cnf"
INFO[0000] Starting mysqld_exporter (version=0.11.0, branch=HEAD, revision=5d7179615695a61ecc3b5bf90a2a7c76a9592cdd) source="mysqld_exporter.go:206"
INFO[0000] Build context (go=go1.10.3, user=root@3d3ff666b0e4, date=20180629-15:00:35) source="mysqld_exporter.go:207"
INFO[0000] Enabled scrapers: source="mysqld_exporter.go:218"
INFO[0000] --collect.global_status source="mysqld_exporter.go:222"
INFO[0000] --collect.global_variables source="mysqld_exporter.go:222"
INFO[0000] --collect.slave_status source="mysqld_exporter.go:222"
INFO[0000] --collect.info_schema.tables source="mysqld_exporter.go:222"
INFO[0000] Listening on :9104 source="mysqld_exporter.go:232"
登录到端口 9104 的界面,可以看到抽取的数据信息。
4)在 Prometheus 中配置 mysqld_exporter
exporter启动后,需要在 Prometheus 中正确的配置。修改 prometheus 目录中的prometheus.yml,增加配置如下:
[root@albert prometheus-2.3.1.linux-amd64]# cat prometheus.yml
# my global config
global:
scrape_interval: 15s # Set the scrape interval to every 15 seconds. Default is every 1 minute.
evaluation_interval: 15s # Evaluate rules every 15 seconds. The default is every 1 minute.
# scrape_timeout is set to the global default (10s).
# Alertmanager configuration
alerting:
alertmanagers:
- static_configs:
- targets:
# - alertmanager:9093
# Load rules once and periodically evaluate them according to the global 'evaluation_interval'.
rule_files:
# - "first_rules.yml"
# - "second_rules.yml"
# A scrape configuration containing exactly one endpoint to scrape:
# Here it's Prometheus itself.
scrape_configs:
# The job name is added as a label `job=<job_name>` to any timeseries scraped from this config.
- job_name: 'prometheus'
# metrics_path defaults to '/metrics'
# scheme defaults to 'http'.
static_configs:
- targets: ['172.16.94.181:9090']
# - job_name: mysql
- job_name: mysql
static_configs:
- targets: ['172.16.94.181:9104']
labels:
instance: db1
备注:
job_name,当前执行job的名字
targets,连接的主机
instance,数据库实例的标签明
重启 prometheus,点击导航栏中的 status->targets 可以看到,mysql 的 exporter 已经集成进来了。
5) Grafana 和 Prometheus 关联
现在增加数据源将 Grafana 和 Prometheus 关联起来。点击 Add data source,如下填写数据保存即可:
出现 DATA SOURCE IS WORKING 表示关联成功
6)添加仪表盘
Grafana,提供了大量的仪表盘展示 json,可以到官网进行选择。
本文在 Grafana GitHub 上随意选择了一个 json
把 json 导入到本地
到这里,大功完成了。一起来看一下监控仪表盘吧!
03 表盘内容
